Creating and configuring IAM policies and entities
The following steps explain how to create and configure IAM policies and entities with the end goal of creating an IAM user that you provide when you register your application. In this workflow you create an IAM user (with an AWS STS policy attached) that assumes an IAM role that has permissions to call Selling Partner API (Amazon Shipping APIs).
Step 1. Create an AWS account
You need an AWS account because the Selling Partner API (Amazon Shipping API) security model uses AWS authentication credentials. If you're not already an AWS customer, you can create a free AWS account. For more information, see AWS Free Tier.
Step 2. Create an IAM policy
This IAM policy defines the permissions required to make calls to the Selling Partner API. Attach this policy to the IAM User that you create in Step 3.
Use the following procedure to create an IAM policy
-
Sign in to the AWS Management Console, and then open the IAM console at console.aws.amazon.com/iam.
-
From the left navigation pane, select Policies.
-
If this is your first time choosing Policies, the Welcome to Managed Policies page appears. Choose Get Started.
-
Select Create policy.
-
Choose the JSON tab.
-
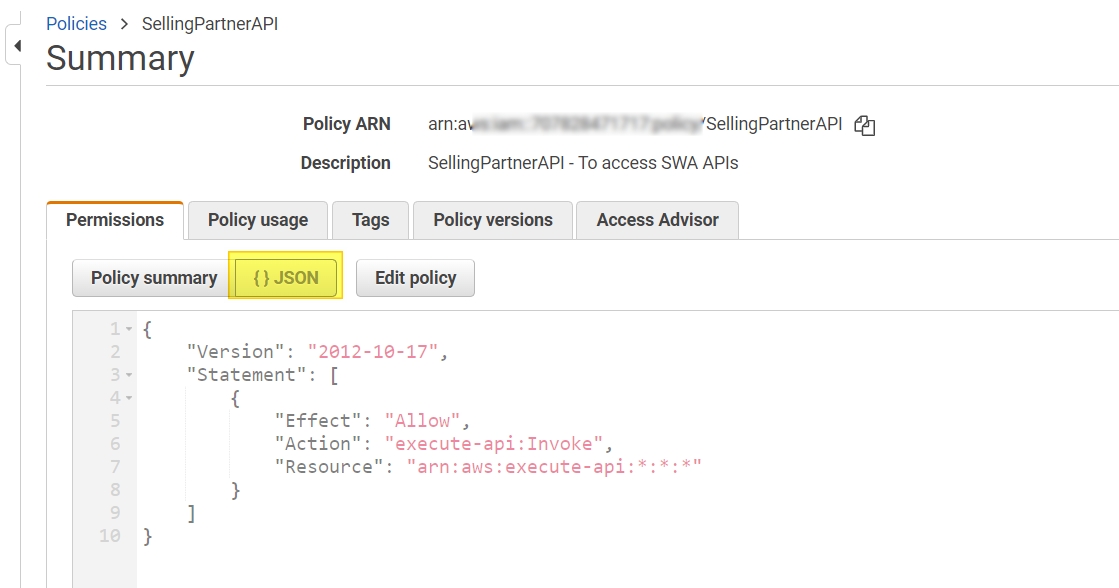
Paste the following code into the text box (replacing the existing code), and then choose Next: Tags.
{
    "Version": "2012-10-17",
    "Statement": [
        {
            "Effect": "Allow",
            "Action": "execute-api:Invoke",
            "Resource": "arn:aws:execute-api:*:*:*"
        }
    ]
}
-
On the Add tags (Optional) page, add any desired tags, then choose Next: Review.
-
On the Review policy page, enter a Name and a Description (optional) for the policy that you are creating. We recommend naming your IAM policy, SellingPartnerAPI.
-
Review the policy Summary, then choose Create policy.
Once the policy is created, you can review the policy: Sample below:
Step 3. Create an IAM user
Create an IAM user to get AWS keys to authenticate calls to the Selling Partner API. We recommend creating a new IAM user exclusively for this purpose.
To create an IAM user
-
If you are not already signed in, sign into the AWS Management Console and open the IAM console at console.aws.amazon.com/iam.
-
In the navigation pane at left, click Users and then click Add user.
-
Enter a user name for the new user. We recommend you follow the naming convention AmazonShipping_<Developer/ShipperName>. Example: AmazonShipping_DunderMifflin
-
Select Access key - Programmatic access and then click Next: Permissions.
-
On the Set Permissions page, click on Attach existing policies directly
-
On the Add tags (optional) page, add optional tags if you want them, else, click Next: Review.
-
On the Review page, review the choices you have made. When you are ready to proceed, click Create user.
The AWS access key ID for your new IAM user is displayed.
-
Click Show to view the AWS secret access key. To save the AWS access key, click Download .csv and then save the file to a safe location.
To locate the User IAM ARN, please use navigation pane at left and click on Users. Click on the newly created user to get the IAM ARN required during App creation process
Sample Screenshots:
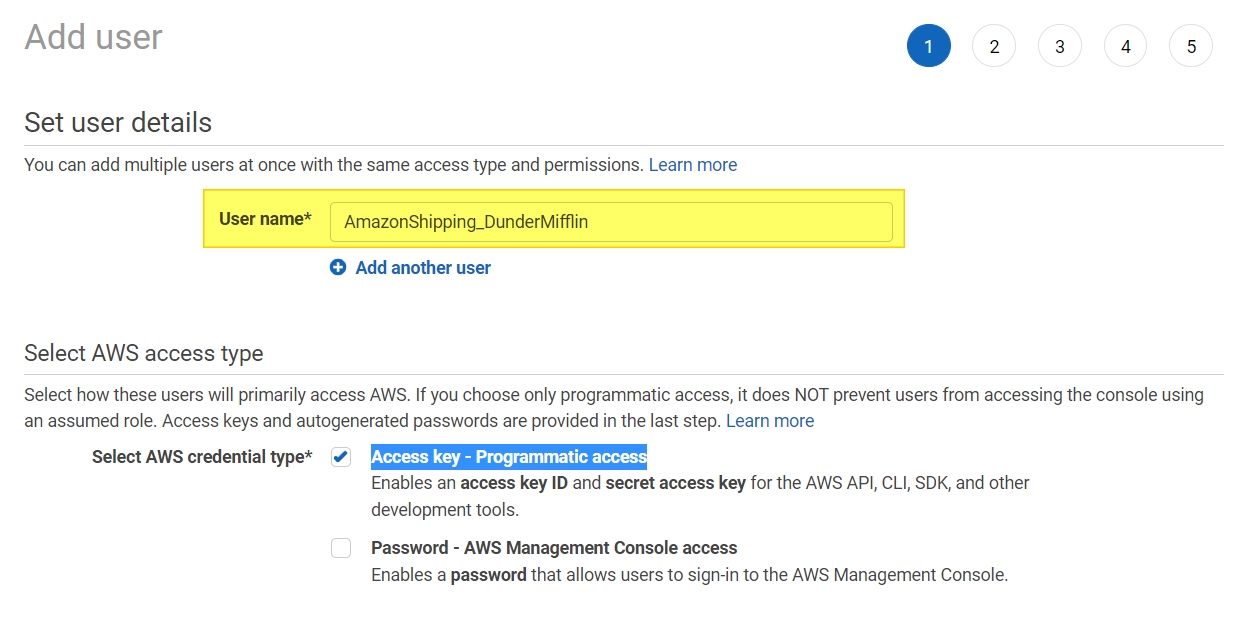
Enter User name*
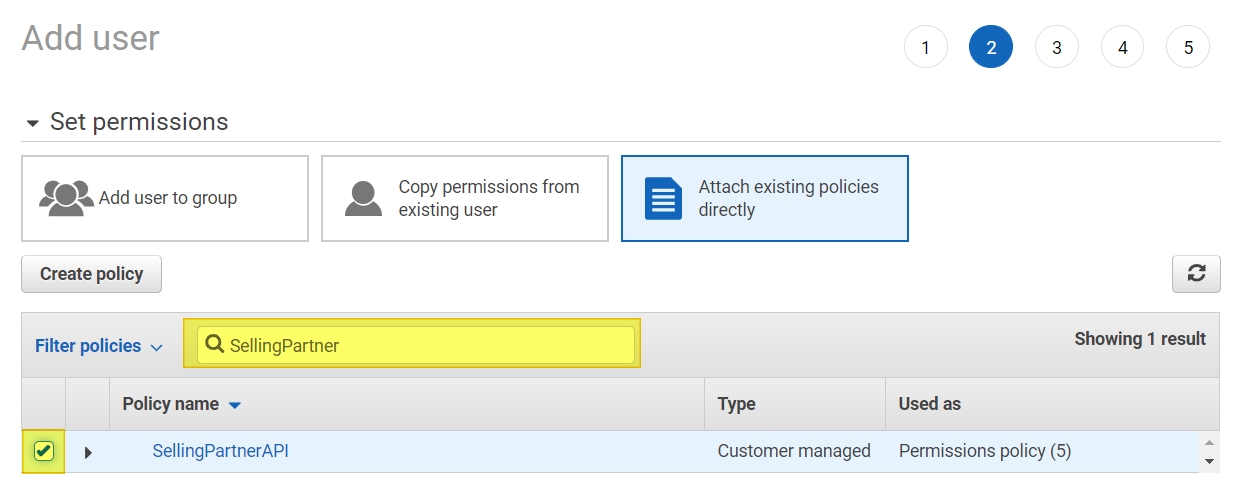
Attach policy to the User
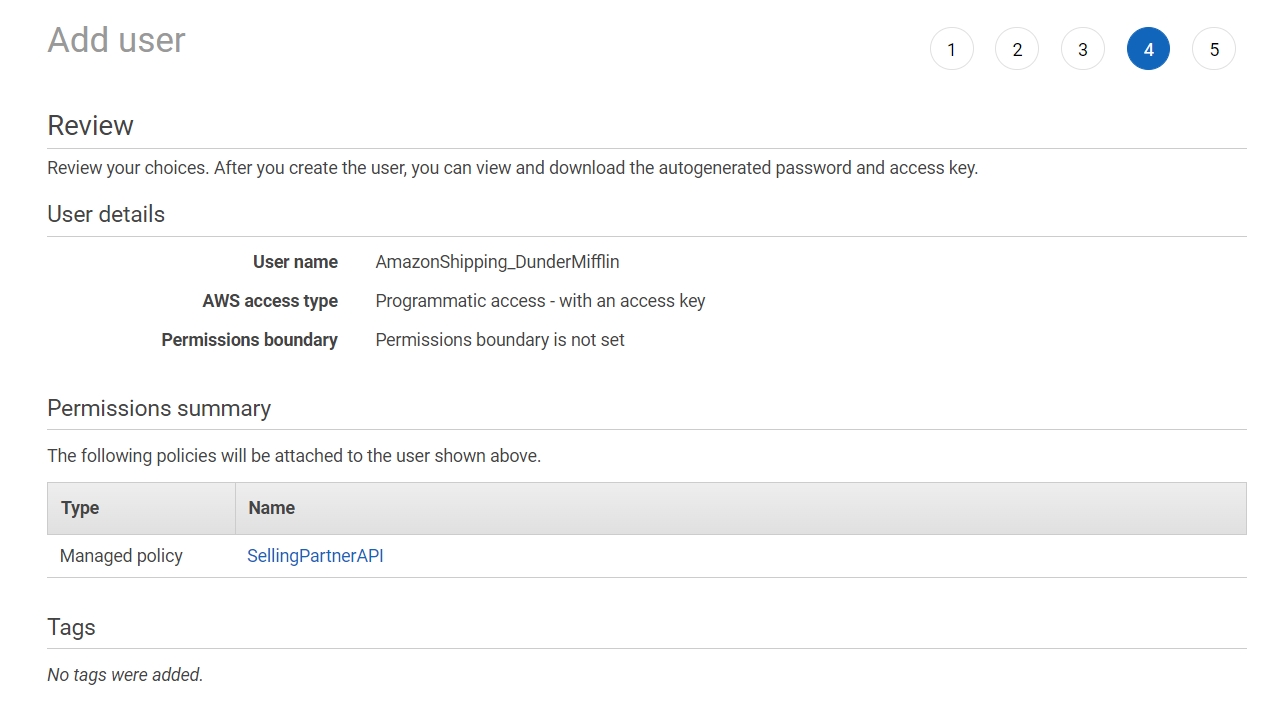
Review User details
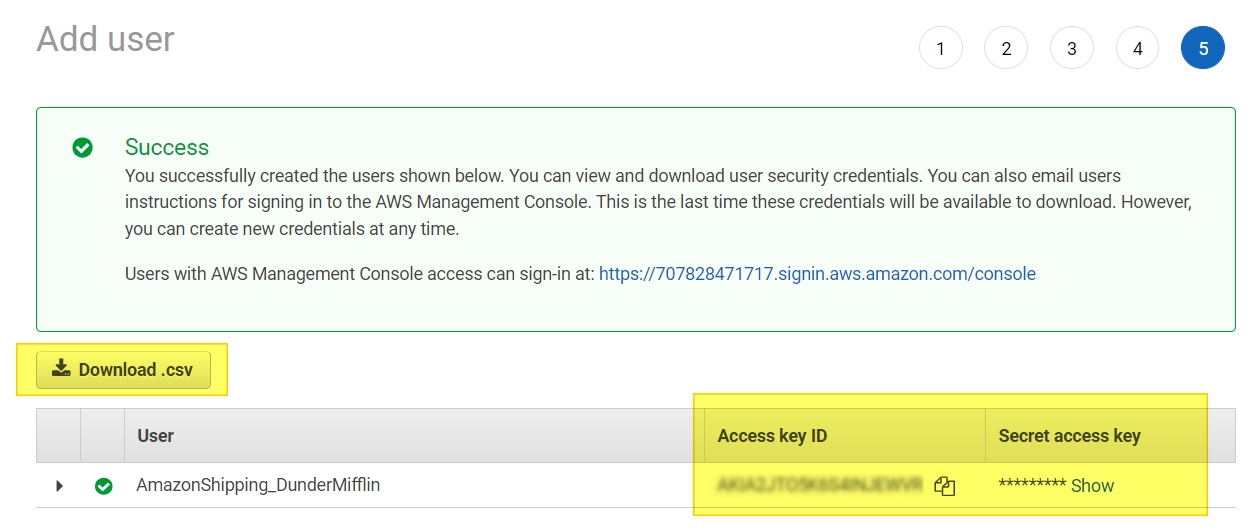
Download Access and Secret Key (Required to make API calls)
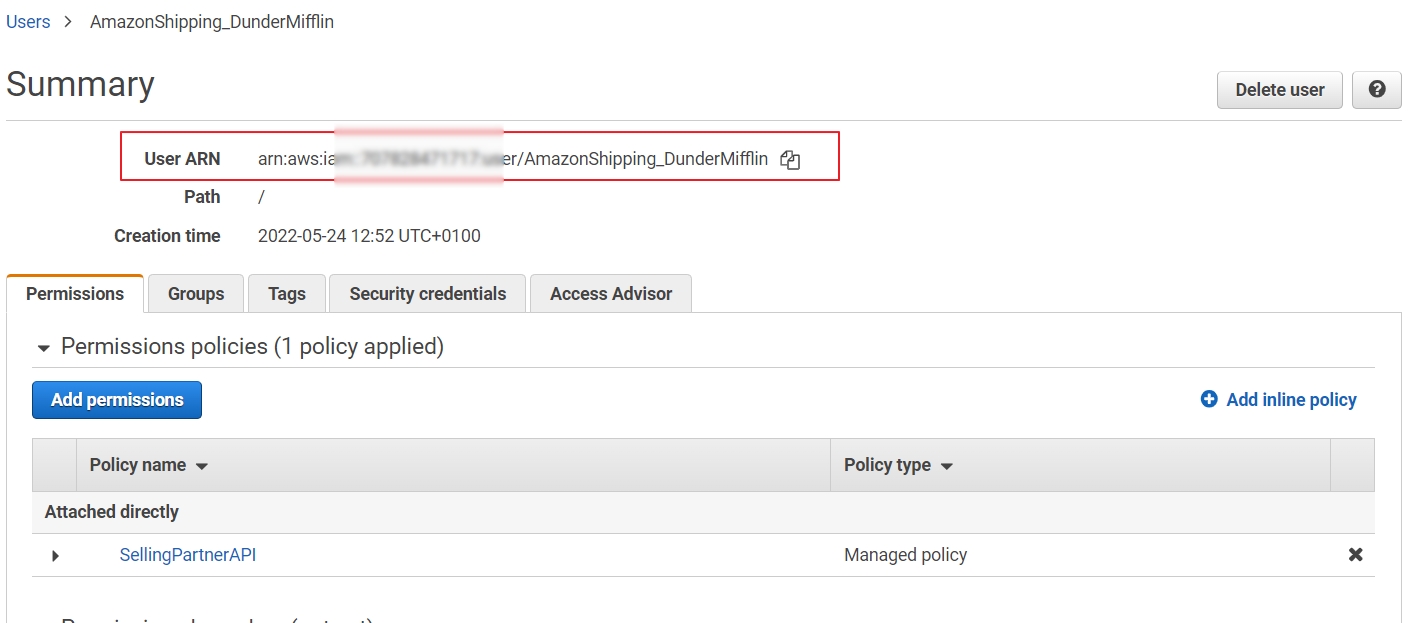
IAM ARN required for App creation
Updated over 1 year ago
