3rd Party Partner Integrator (Enabling Other Sales Channel Sellers)
This document provides a summary of the overall process and the specific steps to 1) Register for a developer account, 2) Obtaining your API credentials, and 3) Accessing the Shipping APIs.
Amazon Shipping Integration Guide For Third Parties (3P) and Third Party Logistics Provider (3PL)
This guide provides an overview of the process of integrating with the Amazon Shipping APIs. This documentation assumes that your organization intends to build an integration that will serve Sellers/ Shippers who have their own selling channel and utilizing Amazon Shipping for label creation.
After you complete the steps listed in this guide, you will be able to submit a Shipping Partner application which provides the credentials to access the Amazon Shipping APIs, and establishes the pages required to allow shippers to authorize your application.
Steps
Below these steps to create a Seller Partner application to receive your API credentials to call the Amazon Shipping APIs, and develop the OAuth 2.0 authorization flow to get authorization token/ credentials to call the Shipping APIs on behalf of a shipper.
Step 1: Register an Amazon Shipping RIVER account (Optional but recommended)
This step will allow you access to RIVER, the communications platform you will use to contact our support team if you need help with any of the below steps.
- 1.1 To get started, you would need to connect with your account manager. The account manager will invite the relevant point of contact in your organization to create an account on RIVER. Please accept the invite and create an account.
Step 2: Registering as a Developer**
Through this step, you will request access to the Amazon Logistics role from your Amazon Developer Central account. These details enable us to vet and approve your permissions to have access to the data via our APIs.
- 2.1 If you are already an existing MWS Developer, please click on ‘Edit App’ next to your app on Developer Central and choose ‘MWS and SP API’ under ‘API Type’. Fill out the same set of information that is requested for app creation today [such as OAuth URLs]. Once complete, you should be able to access Shipping APIs.
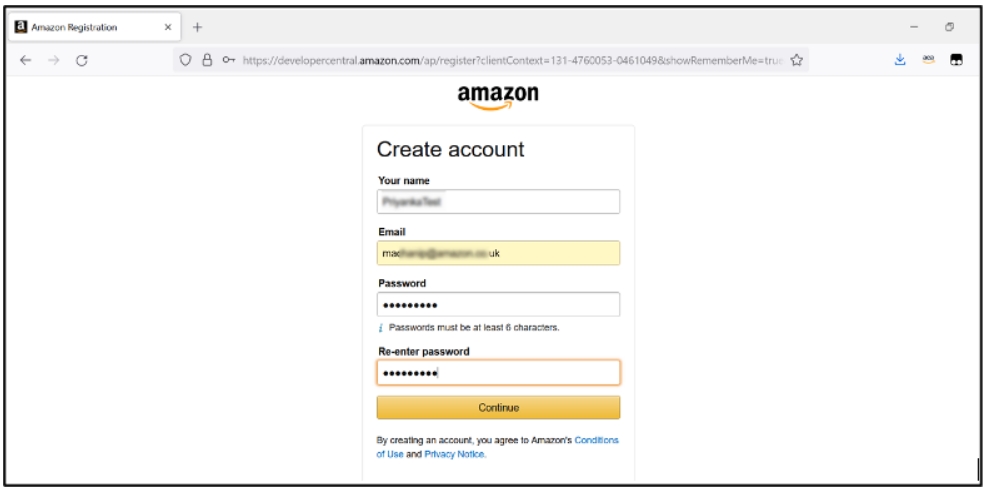
- 2.2 If you do not already have a Developer Central account (https://developercentral.amazon.com/), please create one. (Note: You are not required to create a Seller account to call the Shipping APIs). We recommend to use a company generic email address which is accessible by the technical/ development team. Below represents one way to create an account:
-
Enter all the requested information and click ‘Continue’.
-
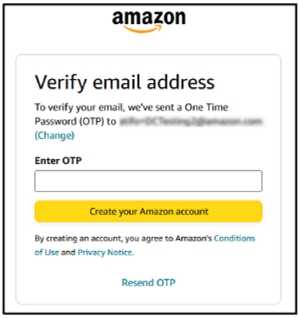
In the next step, OTP is sent to verify the email address, Please fill in the OTP in the text box, as shown in the picture below and verify the email.
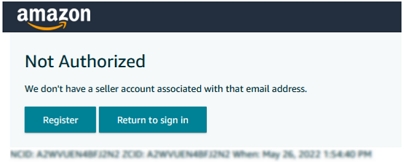
- If you are an existing Amazon seller, you can use your Seller Central account. If you are a a new developer, please select Register.
- After Clicking on Register, Enter the Developer Name in “Your account name” and click Continue.
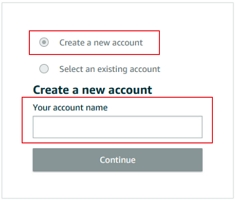
- Once you have created the account, please proceed to the next step.
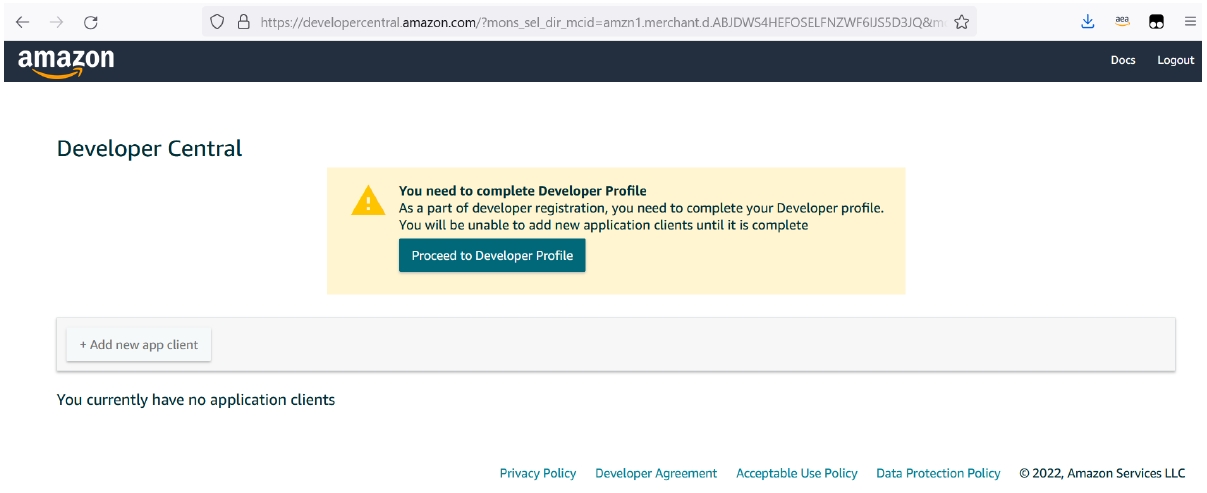
Once login to Developer Central is complete, you will be able to proceed to register as a developer when you are logged in. These steps provide details about your organization and application, which enable Amazon to vet and approve your permissions to have access to data via Amazon Shipping APIs. Ensure you provide accurate contact details (Email ID) for future communications.
- 2.3 Please click the Proceed to Developer Profile button. Otherwise, click the Your Developer Profile link (https://developercentral.amazon.com/). And complete the form.
- 2.4 Select the option that best represents that application you are building
Public Developers should select the option that reads “Public Developer: I build and offer publicly available applications that are used by other companies.”

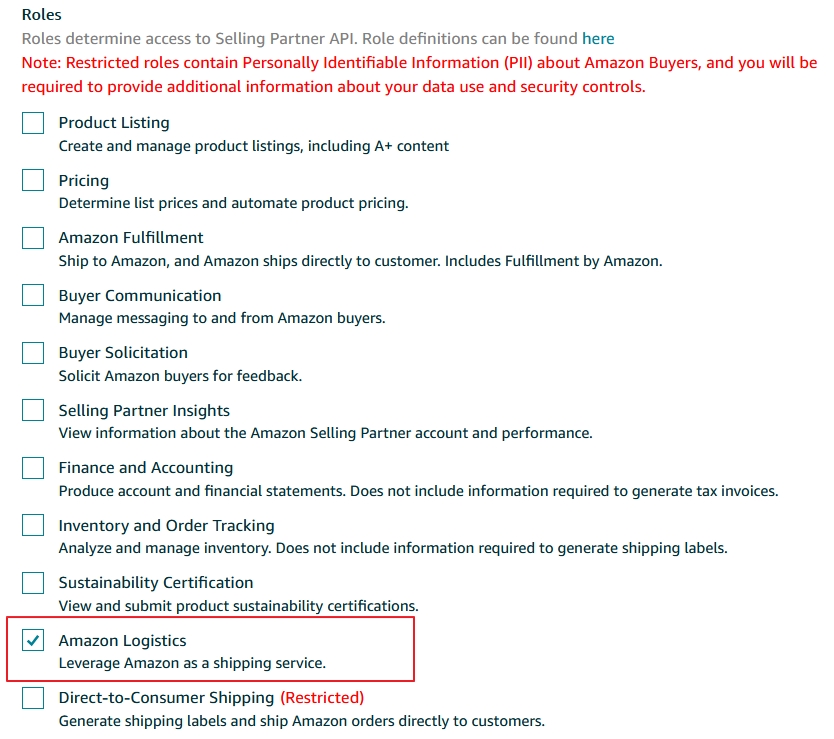
- 2.5 Please select the functions your application will perform. This will provide you the appropriate scope to access specific APIs. To access the Shipping APIs, select “Amazon Logistics: (Leverage Amazon as a shipping service.)”.
Selecting the correct Role is Important !
Note - Please select Amazon Logistics role only if your Shippers will purchase OFF Amazon labels. For generating ON Amazon labels, you must also select the Direct-to-Consumer Shipping role.
Refer guide 3P On-Amazon or Hybrid for both ON and OFF Amazon label requirement.
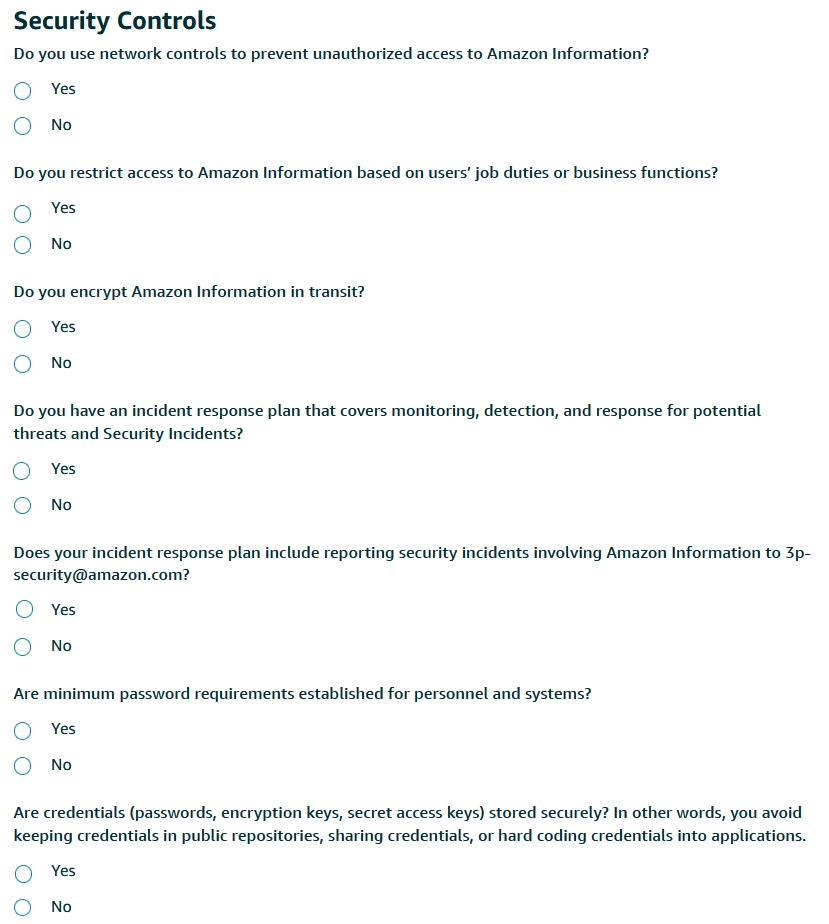
You will now go through the data protection requirements questionnaire under Security Controls. These responses will be reviewed by a team that assess your security posture. Amazon holds a high bar for data protection and to ensure there is no delay to your application, we recommend you respond as thoroughly as possible. Please reach out to your account manager if you have questions.
- Provide elaborate details of the mechanisms you have in place for all the questions.
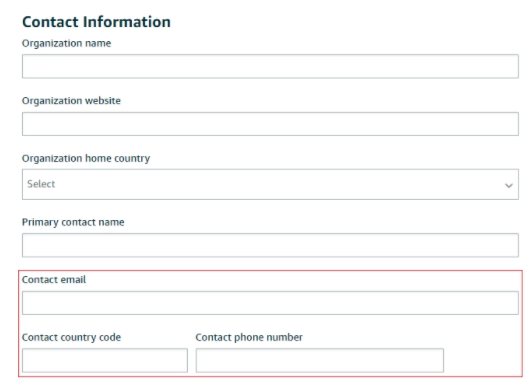
- Provide accurate contact details in the form (screenshot below) for any future communications
- For the below questions, provide in detail the application which you are building and it will be used.

- Complete the Security Controls questions
-
Have a process in place to notify [email protected] of identifying any security threat (# 1.6 in DPP) and call this out as a part of your incident response plan in this question.
-
Complete the 2 descriptive questions by providing the required details.
For Question: List all non-Amazon MWS sources where you retrieve Amazon Information > If your organization is not exchanging Amazon Information from non-Amazon MWS source, please mention the question is not applicable and the reason for it.
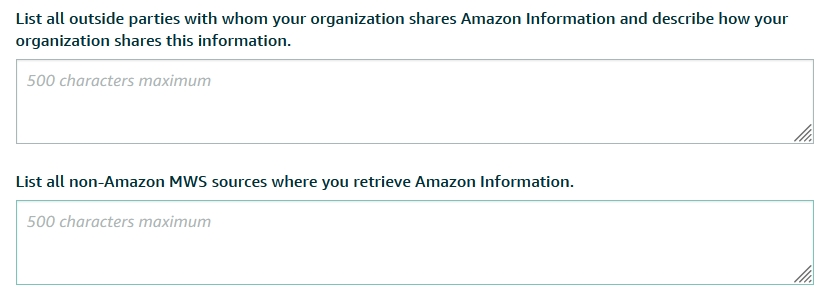
- 2.6 Once you have submitted you the form, please capture the case number that is generated so that we can expedite the process.
- 2.7 You should expect to receive a response within 4-7 business days. When you get the response, ensure that you have the Amazon Logistics role assigned to your Developer account and not a General Role. The Amazon Logistics role ensures that your Developer credentials have access to the Amazon Shipping APIs for OFF Amazon label creation. If your developer profile is approved but you do not have access to Amazon Logistics role, then please select the Amazon Logistics role and re-submit the developer registration questionnaire.
Step 3: Creating your Seller Partner Developer App
This step will establish a Selling Partner application that will provide you the API credentials to call Amazon Shipping APIs.
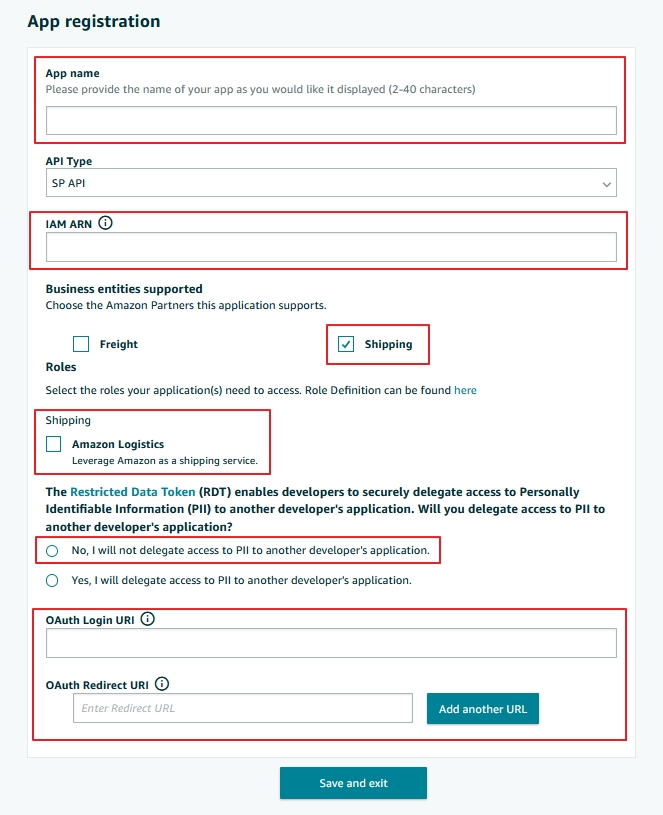
- 3.1 Retrieve the details for the OAuth 2.0 process for shippers to grant you permissions to act on behalf of them.
Note. If you are registering a public application, Shipping/ Seller/ Vendor check boxes appears after you choose the SP-API type. Choose Shipping for your Shipping use case, Seller for your Selling use case, and both if applicable.
Step 4: Integrate with the Amazon Shipping APIs
This step details the process of integrating with Amazon Shipping APIs. At this point, you should have access to your Selling Partner application and your API credentials to make calls to the Amazon Shipping APIs.
- 4.1 Please review the Amazon Shipping API user guide and Swagger model for details on the API operations and behavior.
- 4.2 Develop your integration. If there is any support required, please reach out to your Account manager to get the right support to solve. We recommend that you support these use cases at the minimum:
- Functionality to get rates via the Shipping APIs.
- Functionality to purchase shipment via the Shipping APIs.
- Functionality to cancel shipment via the Shipping APIs.
- Functionality to track shipment via the Shipping APIs.
- 4.3 Produce a test label and follow the steps on the Amazon Shipping Test Label Guide for sign off.
Step 5: Support OAuth 2.0 to enable shippers to authorize your application
This step details the process of supporting OAuth 2.0 to enable shippers to authorize your application to create and manage shipments on their behalf. Amazon Shipping utilizes OAuth 2.0 to securely pass third-parties the API credentials programmatically. Amazon does not allow for API credentials to be externalized and then used in third-party applications.
- 5.1 In the Selling Partner API Guide, refer to the section titled Authorizing Selling Partner API applications.
- 5.2 Complete the effort to support Website workflow.
- 5.3 Provide your sign-in URI and redirect URI to your Amazon Shipping Solutions Architect, and your Solutions Architect will configure your app’s sign-in and redirect URI’s.
Need more details on OAuth 2.0 ?
Refer to the documentation to build 3P Website Authorization Workflow for Amazon Shipping API
Step 6: Demo the end-to-end integration and prepare for launch
This step details the final step of the integration where third-party integrator are required to submit test labels for review and demo the integration’s functionality with Amazon Shipping.
- 6.1 Communicate to your Partnership Manager that the integration is completed and ready for demo.
- 6.2 Your Amazon Shipping contact will schedule a call with the Amazon Shipping team where you will demo the integration.
- 6.3 If there is no follow up or modifications required after the demo, your Partnership manager will work with you to confirm clients interested in utilizing the integration and set a timeline to launch each client.
Congratulations! You have completed your integration with Amazon Shipping!
Updated 2 months ago
